My ombré rocks tutorial is one of the most popular in my blog (check it HERE).
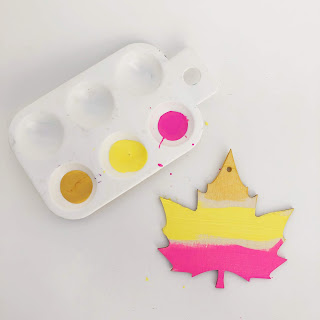
I decided to use this technique with a wooden maple leaf
and love how it turned out!
Actually, it's much easier to work with a wood surface than with a rock surface as the wood absorbs the paint easily and dries faster too!
As I worked with two colors on the rocks, I decided to work with three
shades on this tutorial.
Enjoy!

Supplies needed
(affiliate links for your convenience)
- Wooden maple leaves
- Make up sponge wedges
- Acrylic paint set
- Paint Pallet
- Tombow Monotwin or Faber-Castell Pitt Artist
Directions
Step 1. Paint each 1/3 of the leaf with a solid color. Let it dry. Paint a second layer with the same colors and this time get the colors to almost touch each other.

Step 2. On the flat side of the sponge (the same you use to make up), put one of the colors on half of the sponge and the other color on the other half.
Step 3. Use a small brush to mix both colors together on the pallet and then add it on the middle of the sponge.
Step 4. Repeat step 3 for the other two colors.
Step 5. Start tapping the sponge near the middle of the leaf. First I go up and down and when the colors are mixed, I also sponge the line with light horizontal movements.
To get to the ombré effect that I wanted,
I repeat the steps 3, 4 and 5 two more times.
It depends on the quality of the acrylic paint and the effect you want.
For more ideas, follow:
Instagram Word Rocks Project
Pinterest Word Rocks Project
Facebook Word Rocks Project


Comments
Post a Comment
You always rock!